
이클립스에서 톰캣 연동
Window
-> Preferences
-> Server
-> Runtime Environments
-> Add
-> Apache Tomcat v9.0
->Next
->Browse...
->apache-tomcat-9.0.67 설치 폴더 선택
톰캣 서버 복사
Servers 탭 -> New -> Apache Tomcat v9.0 -> Finish

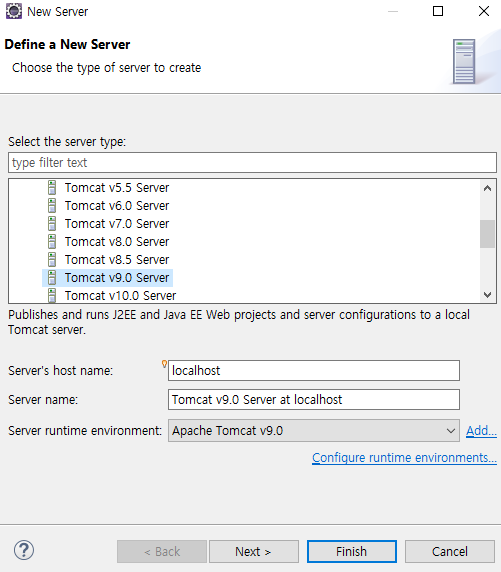
연동 후 (Servers 탭에 표시되는 Tomcat v9.0 Server at localhost는 복사본이다.)

빨간색으로 표시한 버튼을 클릭하면 실행이 되고 console 창에
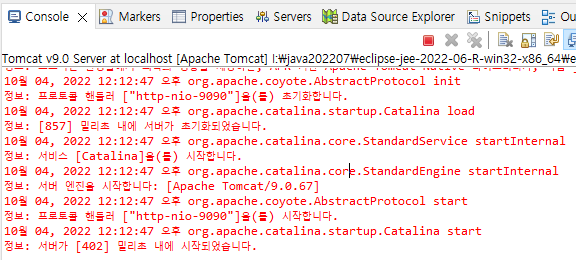
이렇게 출력이 된다.
Dynamic Web Project 생성
Dynamic Web Project -> Project name : basic04_web
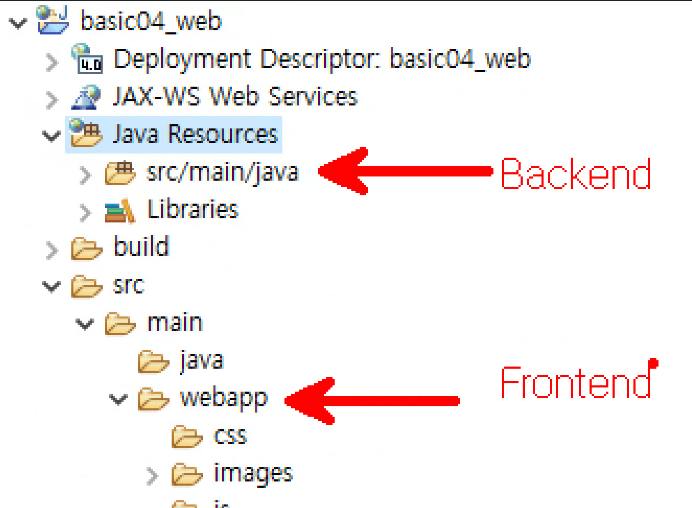
[Backend]
src/main/java -> .java
build/classes -> .class
[Frontend]
src/main/webapp -> .html .css .js .jsp 이미지들

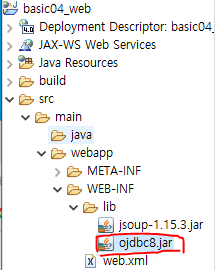
WEB-INF\lib : 자동 생성되며, 관련 드라이버 복사해서 사용한다.
WEB-INF\web.xml : 환경 설정 파일이며, 자동 생성된다.
이제 라이브러리에 오라클을 추가하자. 이전에 jdbc 할 때 추가했던 방식으로 하면 된다.
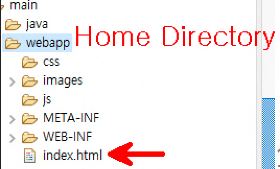
webapp 안에 폴더를 추가하자
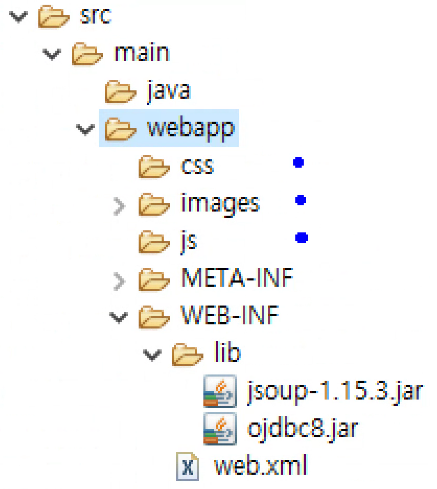
Backend와 Frontend를 구분해서 작업한다.
webapp폴더에서 index.html 문서를 생성한다.
index.html
<!DOCTYPE html>
<html>
<head>
	<meta charset="UTF-8">
	<title>Insert title here</title>
</head>
<body>

	<h1>환영합니다~~</h1>
	<hr>
	<img src="./images/angel.png">
	<!--
		● 결과확인
		index.html 우클릭 -> Run As -> Run on Server

		● Frontend 단의 물리적인 경로는 접근 불가능
		http://127.0.0.1:9090/src/main/webapp

		● Context Root로 접근해야 한다
		http://127.0.0.1:9090/basic04_web/index.html
		http://localhost:9090/basic04_web/index.html
		http://192.168.14.19:9090/basic04_web/index.html  실제ip(확인 : 명령 프롬프트에서 ipconfig)
	 -->
</body>
</html>이제 서버를 실행하자

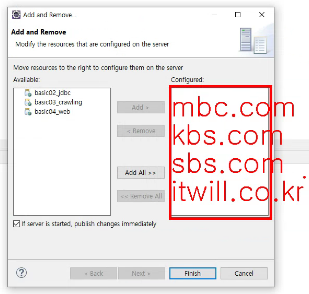
톰캣은 하나만 돌릴 수 있기 때문에 Configured에는 하나의 프로젝트만 와야 한다.

basic04_web을 add 한 뒤 finish를 한다.
이제 index.html 우클릭 -> Run As -> Run on Server -> 서버 선택 후 finish를 하거나 Servers 탭에서 서버를 실행 후 아래 주소를 브라우저에 입력하면 index.html이 나온다.
http://127.0.0.1:9090/basic04_web/index.html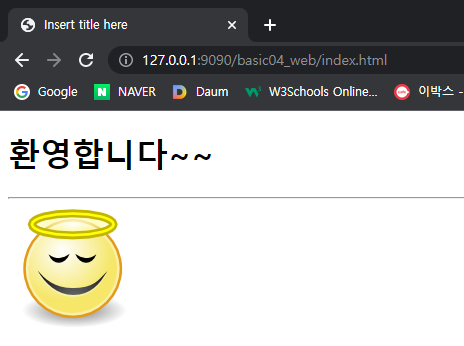
http://192.168.14.19:9090/basic04_web/index.html컴퓨터와 같은 인터넷 회선을 가진 와이파이를 통해 스마트폰으로 위의 주소를 접속하면 index.html 화면이 보인다.
'웹개발 교육 > jsp' 카테고리의 다른 글
| [48일] jsp (6) - 함수 (0) | 2022.10.05 |
|---|---|
| [47일] jsp (5) - 배열 (0) | 2022.10.04 |
| [47일] jsp (4) - 표현식 (0) | 2022.10.04 |
| [47일] jsp (3) - 기본 문법 (0) | 2022.10.04 |
| [47일] jsp (1) - 개요 및 Tomcat 설치 (0) | 2022.10.04 |